Client User Guide
Dual-Device Link is a unique feature of Offerin AI. By using a second device to display AI-generated answers, it ensures 100% undetectable.
Download Links
Download Instructions:
- If you encounter any issues, please contact us immediately.
System Requirements:
- Recommended: Windows 10 or higher
- Supports only Mac OS 13.0 or higher
Core Features
- Dual-device Link: Install the client on your computer and open the webpage on a tablet for the perfect pairing.
- High Concealment: The client displays no prompts on the screen, ensuring your privacy.
- Browser Restriction Override: Break through browser limitations and use with any meeting software.
- Global Shortcuts: Use system-wide shortcuts to trigger responses without needing to click a mouse.
- Automatic Screen Text Detection: Extract questions or algorithm challenges with a single click, stealthily.
- Automatic Clipboard Text capture: When you copy text, it triggers a helpful response automatically—quick and smart.
You can view how to use all shortcuts in the “Shortcuts” pop-up at the bottom right corner of the web interface.
Installation Guide
MacOS
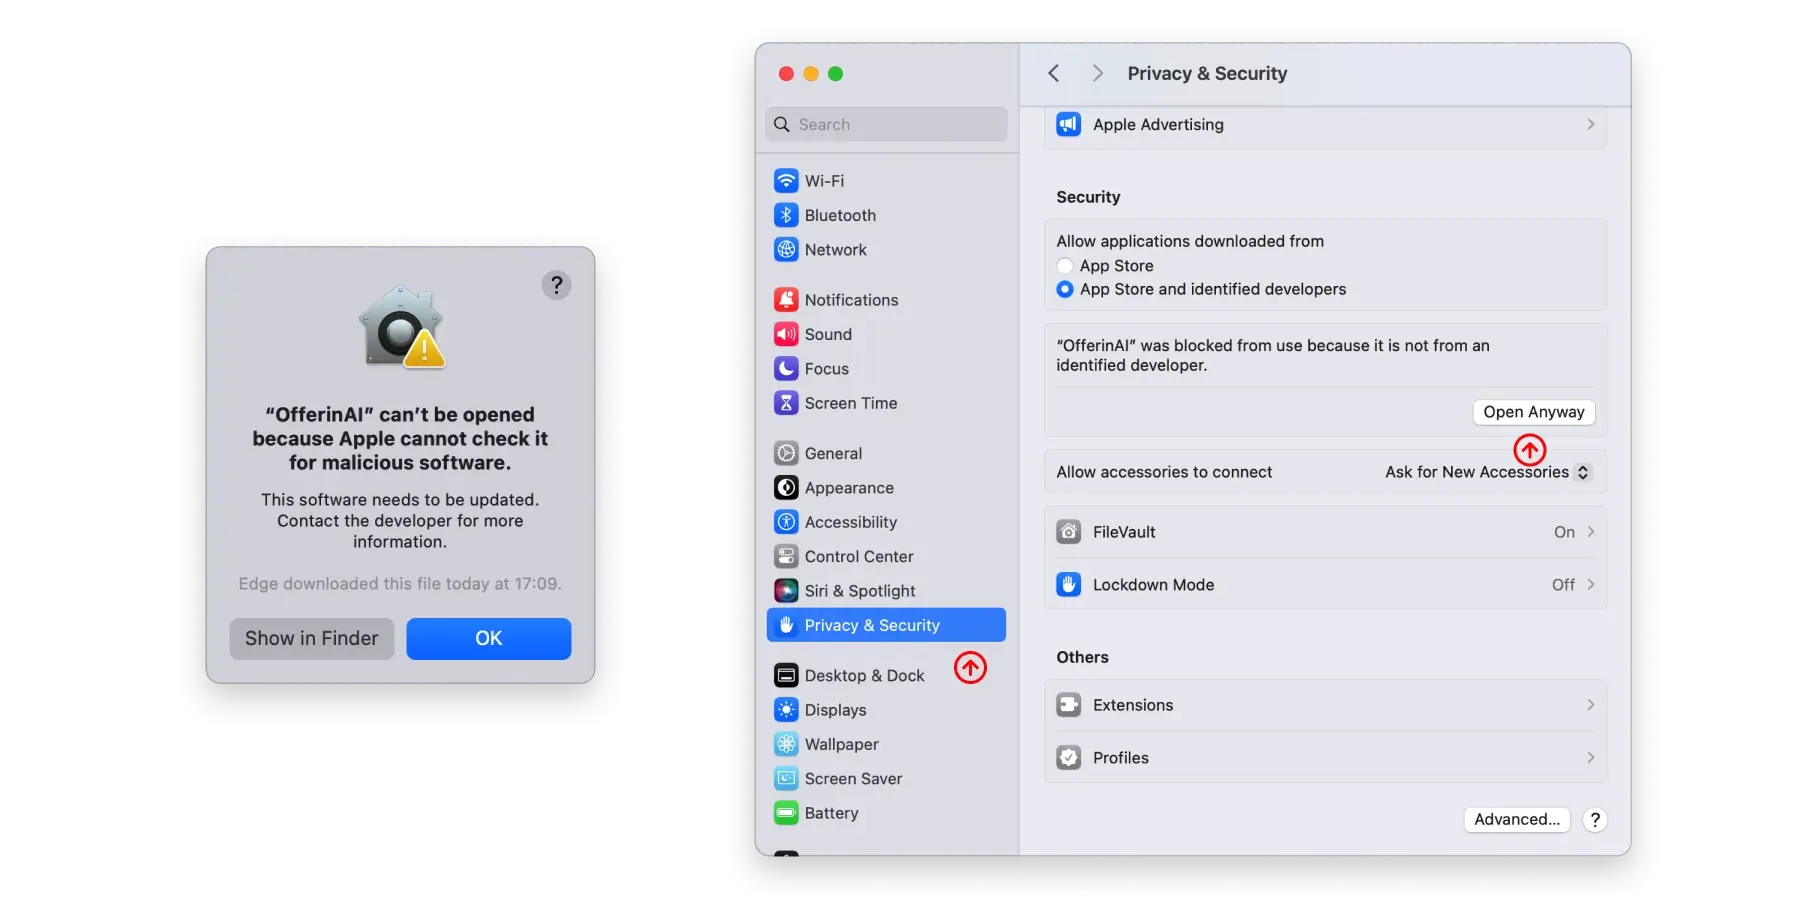
You may encounter the following warning during installation; this is normal.
- After downloading the
.dmginstallation package, double-click it to enter the installation interface. Follow the on-screen instructions, drag the icon on the left to the blue folder on the right to complete the installation.

- The first time you try to open Offer IN, you will see a warning like the one on the left in the image below. This is normal. Simply click
Show in Finder, then right-clickOffer IN, selectOpen, and a warning will pop up again. ClickOpento proceed.

- When you first open the client, it will prompt you to grant microphone and screen recording permissions. Please follow the instructions to allow these.
Windows
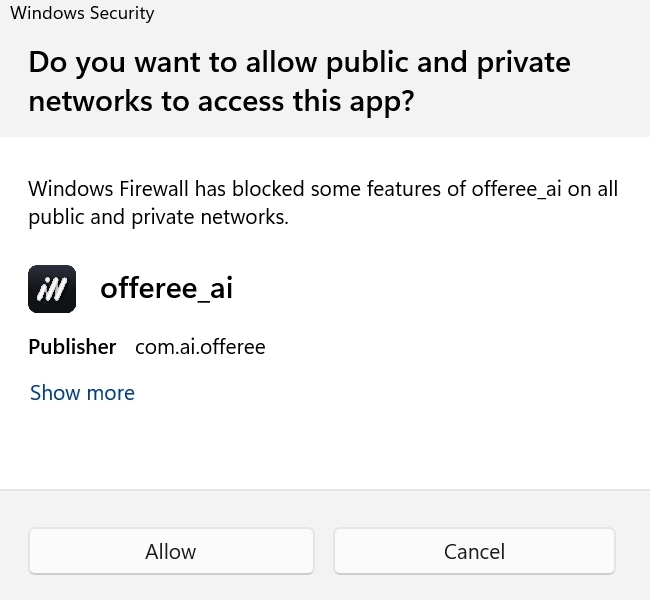
Important Notice: When you first launch the client, a network permission authorization window will appear. Please ensure to click Allow! Otherwise, it will affect dual-device connectivity.

After completing the installation, you might encounter the following issues:
VCRUNTIME140.dll missing
- Please install the missing dependency: Download Link, then restart your computer.
- If this does not solve the issue, please contact us promptly.
For other issues, please refer to FAQ.
How to Use the Client
-
When you first open the client on MacOS, it will prompt you to grant microphone and screen recording permissions. Please follow the instructions to allow these.
-
Open the Offer IN client and check the following:
- Audio Input Device: Select the microphone on your computer. If the green volume bar moves, it indicates a successful setup.
- Audio Output Device: Select your headphone device. Play some music or a video—if the volume bar moves, it’s successful.
- Ensure the audio forwarding service is running.
-
The client supports two usage modes:
- Local client link :
- Connect the local client to forward audio and unlock all shortcuts and screen text detection features.
- Use Case: Highly recommended if you have two monitors.
- Detailed Guide: Refer to the local client link guide
- Dual-device link:
- Conduct interviews on the computer, view answers on anthor device.
- Use Case: highly recommended for all kinds of interviews and Online Assessment.
- Detailed Guide: Refer to the dual-device link guide
- Local client link :
-
After selecting the appropriate mode in the web interface, follow the connection guide pop-up to connect.
-
You can adjust the input and output devices at any time in the client, where:
- Input Device refers to the microphone, typically used to capture your voice.
- Output Device: Captures the other’s voice.
- Windows: Ensure it matches your meeting software’s settings, typically headphones or speakers.
- MacOS: It refers to the system display—keep it as the default.
-
Security: Once connected in dual-device link, any test or interview platform will not detect Offer IN. This has been thoroughly tested. Use the “Hide Window” feature to completely conceal the client’s presence.